

Your prototype is ready. The design decisions have been made, the flows are linked, and the screens are shareable.
What most product teams do next is run a session, watch a few recordings, write up a summary, and move into development.
What they should do is instrument the prototype for in-context feedback, run structured tasks, collect responses when they are most accurate, and use severity, not volume, to decide what to fix.
This guide covers that approach: how to actually test a prototype, screen by screen, question by question, round by round, so the feedback you collect is specific enough to change what gets built.
What Is Prototype Testing, and Why Does It Only Work When You Treat It as a Decision Tool?
Prototype testing is the process of presenting an early version of a product to real users to identify usability issues, navigation gaps, and design mismatches before full development begins. It is iterative by design: each round surfaces problems, the team fixes the critical ones, and the next round confirms the fix worked and did not introduce new issues.
How you frame prototype testing shapes what your team does with it.
If you treat it as a validation ritual before handoff, you will run one round, collect feedback, and ship anyway.
If you treat it as a decision-making tool, you will run multiple rounds, change real things between rounds, and arrive at development with design choices grounded in observed user behavior rather than internal consensus.
The distinction between prototype testing and QA is also worth making explicit.
QA performs functional testing of the tools to ensure they work as intended. Prototype testing checks whether the right product was built in the first place. Both matter, and neither replaces the other.
How Do You Run a Prototype Test That Produces Decisions, Not Just Observations?
Here is the end-to-end workflow focused on what happens after the prototype exists: how to set up feedback collection, structure tasks, ask the right questions at the right moment, and act on what you learn.
Step 1: Define What You Are Testing and Why
The quality of your test is decided before a single user sits down, when you document the specific assumptions your current design is built on.
Not features. Assumptions.
“We believe users will navigate to the upgrade option via the dashboard sidebar.”
“We believe users understand what ‘workspace’ means without a tooltip.”
Each assumption is a testable research question, and each one, if wrong, would change something significant about the design.
Limit each session to 1 to 5 research questions. Every observation beyond those is context, not primary signal. More than 5, and you will exit the session with findings too diffuse to prioritize.
If you are unsure which assumptions carry the most risk, behavioral data from your existing product is the fastest way to narrow the list.
Qualaroo’s Session Recordings let you watch real user journeys in your live product, identifying where hesitation, rage clicks, and drop-offs already occur, so your prototype test focuses on friction points that are already costing you rather than ones you are only guessing about.
Step 2: Write Task Scenarios That Reveal Real Behavior
Task scenarios are where most prototype tests are won or lost before the session begins.
The wording of a task changes the behavior you observe, which changes the findings you produce, which changes what gets fixed.
Write tasks around user goals, not product features.
Usability researcher Jared Spool’s work with Ikea demonstrated this directly: asking users to “find a bookcase” sent them straight to the search bar.
Asking users to organize 200 paperback novels in their living room sent them through product categories, revealing how the site’s architecture matched or mismatched their mental models. The second task produced the insight that drove real design changes.
Three rules that change task quality:
- No product terminology users wouldn’t already know. If your product calls something a “workspace,” don’t use that word. Observe whether users discover and understand it themselves.
- No instructions on how to complete the task. Observe what users do without guidance.
- Write for a realistic situation, not a feature demonstration. “Book a flight to Amsterdam” is a demonstration. “You want to visit a friend in Amsterdam next September with two weeks off and a tight budget. Find the best option.” The second produces richer, more differentiated behavior.
Before the real sessions, pilot your task scenarios with one colleague. If they immediately ask for clarification, the wording needs revision. This 15-minute step prevents an entire round of corrupted data.
Step 3: Recruit Participants Who Will Surface Real Problems
Five participants per round is the established starting point, grounded in Nielsen and Landauer’s research showing that 5 users surface approximately 85% of usability problems per iteration.
Three rounds of 5 consistently outperform one round of 15: the first round surfaces structural problems, the second confirms fixes held, and the third cleans up what the first two missed.
That said, 5 is a starting point, not a universal rule. Adjust based on:
- User Segments: If your product serves meaningfully different user types (admins vs. end users, novices vs. experts), recruit at least 3 to 5 per segment per round.
- Task Complexity: Longer, multi-step flows have more failure points and benefit from larger samples.
- Risk Level: High-stakes decisions (a complete navigation redesign, a new checkout flow) warrant more participants before committing to development.
- Test Type: Exploratory rounds can run lean. Confirmatory rounds validating a specific fix need enough participants to distinguish the signal from the noise.
A few recruiting principles that change result quality:
- Recruit slightly broader than your exact persona. Steve Krug’s advice in ‘Don’t Make Me Think’ holds: almost any user will reveal navigational and structural failures.
- Screen out anyone who has seen the prototype. Familiarity masks friction and makes the session nearly useless for discovering new problems.
- Segment by dimensions that matter: technical proficiency, domain familiarity, geography, or use case.
- Get explicit consent before recording. In the EU and a growing number of US states, data protection requirements apply to user research, not just product analytics.
Get explicit consent before recording any session or collecting personal data. In the EU and in a growing number of US states, data protection requirements apply to user research, not just product analytics.
Step 4: Instrument the Prototype With In-Context Survey Questions
The primary signal in prototype testing is observed behavior: what users do, where they hesitate, what paths they take, and where they fail. Moderator notes, session recordings, and task completion data are the foundation of your findings.
In-context survey questions are a useful supplement, not a replacement for observation. They capture reactions at the exact screen where something happened, which is more accurate than a post-session debrief relying on memory. But a survey answer without behavioral context is still just stated preference. Use both together.
When your prototype is hosted on a live URL via Figma, InVision, Marvel, Adobe XD, or Axure, you can attach an in-app survey to that URL and configure it to appear at a time-on-page threshold, an exit signal, or a scroll depth marker.
What this produces is feedback tied to the exact screen and moment where the experience happened, not what the participant remembers 20 minutes after the session ended.
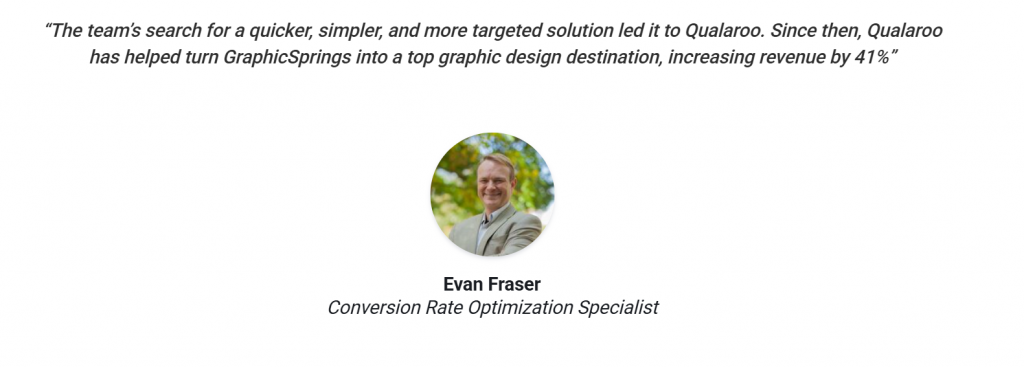
According to GraphicSprings’ case study with Qualaroo, in-context UX feedback contributed to a 41% increase in revenue as part of a broader UX optimization process.
We cover the full setup process in the dedicated section below.
Step 5: Run the Session and Capture Behavioral Signal
During moderated sessions, your job is to observe, not to guide.
- Do not explain what the participant should do.
- Do not react visibly when something goes wrong.
- Do not defend a design decision.
The moment you intervene, the session stops producing a real behavioral signal.
Three principles that change what you capture:
- Ask participants to think aloud. “Tell me what you’re thinking as you look for that” produces more usable data than any post-session debrief.
- Note hesitation, not just failure. A participant who eventually finds the right element via an unexpected path is signaling an information architecture problem, even if the task technically succeeded.
- Don’t count a task as complete just because they got there. Note the time taken, the path chosen, and whether they expressed confidence or uncertainty at the end.
Moderated or unmoderated: which produces the outcome you need?
| Method | When to Use It | What You Gain | What You Trade Off |
| Moderated | Early-stage concepts, complex flows, sessions where follow-up questions would change what you learn | Rich qualitative signal, ability to probe unexpected behavior in real time | More setup time, moderator presence can subtly influence how participants respond |
| Unmoderated | Navigation validation, remote participants across time zones, and later-stage tests where structural issues are resolved | Speed, scale, no moderator influence on behavior | No ability to follow up on unexpected paths or ask why a participant made a specific choice |
Use moderation early, when flows are complex, and you need the reasoning behind user behavior, not just the behavior itself.
Switch to unmoderated when you are validating fixes at scale and need a confirmatory signal without the scheduling overhead.
Step 6: Turn Findings Into Product Decisions That Stick
This is where prototype testing either compounds into value or disappears into a shared folder no one opens.
1. Triage by Severity, Not Frequency
A problem one participant encountered that blocked task completion is more urgent than a complaint; five participants mentioned that it is annoying but not a blocker.
Categorize every finding into three buckets: prevents task completion, slows it significantly, or is cosmetic. Fix in that order.
2. Track Quantitative Metrics Alongside Qualitative Findings
Observations alone make it hard to compare rounds or demonstrate improvement to stakeholders. Four metrics worth capturing per task per round:
Task Success Rate: The percentage of participants who completed the task without assistance. The clearest indicator of whether a flow works.
Time on Task: How long did the completion take? A task everyone completes but takes twice as long as expected signals friction even when the success rate looks healthy.
Error Rate: How often participants took a wrong path, clicked the wrong element, or had to backtrack. High error rates on a specific screen point directly at the redesign target.
Post-Task Difficulty Rating: A single 1 to 5 scale question immediately after each task (“How difficult was that?”) gives you a comparable score across rounds and surfaces perceived friction that behavioral data alone may not capture.
Track these for each task and each round. A task success rate that improves from 40% to 80% between rounds is clearer evidence of a fix working than qualitative notes alone.
3. Retest After Fixing, Every Time
Fixing one issue often shifts behavior around adjacent elements. A navigation change that resolves the original problem can break the path to something else.
The second round catches what the first round missed and confirms the fix held. Without it, you are shipping an assumption, just a more recent one.
4. Document the Decision, Not Just the Finding
“Users could not find the upgrade button” is a finding.
“We moved the upgrade button to the top navigation because three rounds of prototype testing showed users expected to find account management actions there, not in the sidebar” is a decision with evidence.
The second form prevents the button from being moved back six months later when a stakeholder proposes “cleaning up” the navigation.
How to Set Up In-App Surveys Inside Your Prototype Using Qualaroo
Qualaroo’s Nudge for Prototypes lets you collect feedback directly from a prototype without writing a single line of code. It works with Figma, InVision, Marvel, AdobeXD, and Axure. The setup takes a few minutes. Here is exactly how it works.
Step 1: Create a New Nudge for Prototypes
In your Qualaroo dashboard, click “Create a Nudge.” Hover over “Nudge for Prototype” and select “New From Scratch.”
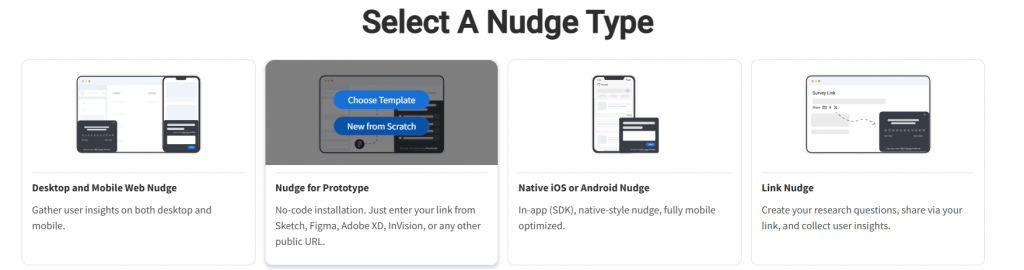
This opens the prototype-specific setup flow, which is separate from a standard website Nudge™.
Step 2: Enter Your Prototype URL
Paste the target URL of your prototype and click “Next.”
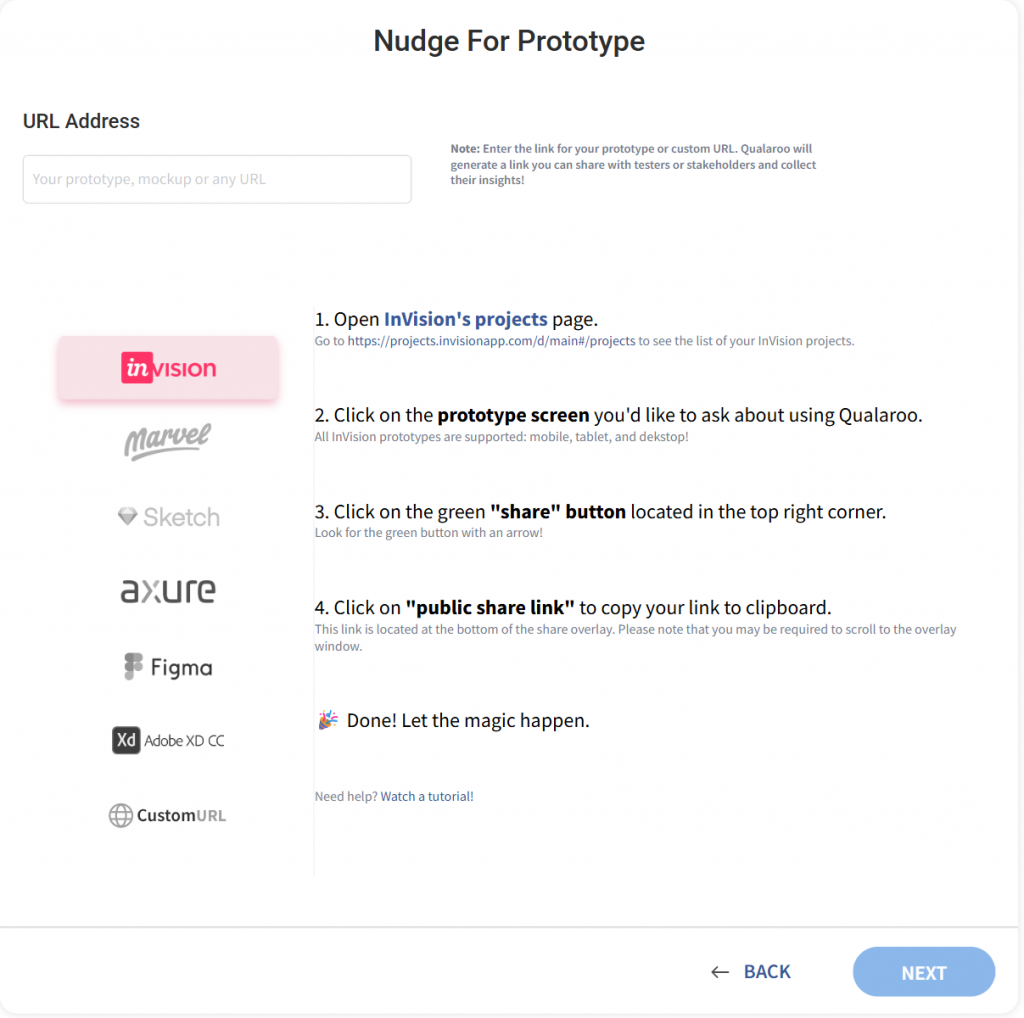
Qualaroo detects which prototyping tool you are using based on the URL and surfaces any tool-specific instructions you need to complete before the Nudge™ will fire correctly.
Make sure the URL is a public or “shared” link.
Private or password-protected links will return an error at this stage. If you are using a tool not on the supported list, select “Nudge for Prototypes with a custom URL” instead.
Step 3: Test the URL
Once Qualaroo confirms the URL is compatible, click “Test Now.”
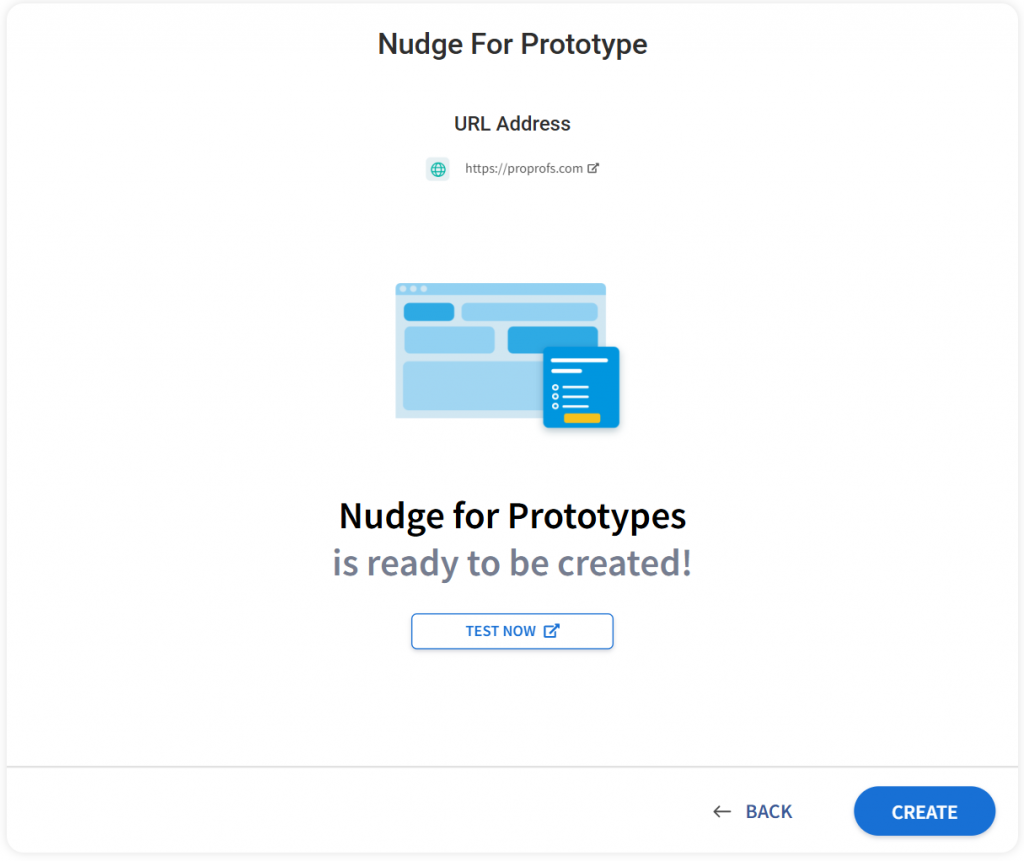
A new window opens showing your prototype with confirmation that Qualaroo has been implemented on it.
This lets you verify the Nudge™ is firing before you send the link to any participants. When you are satisfied, click “Create.”
Step 4: Build Your Question Sequence
With the Nudge™ created, select your questions, answer types, and branching logic in the Edit tab.
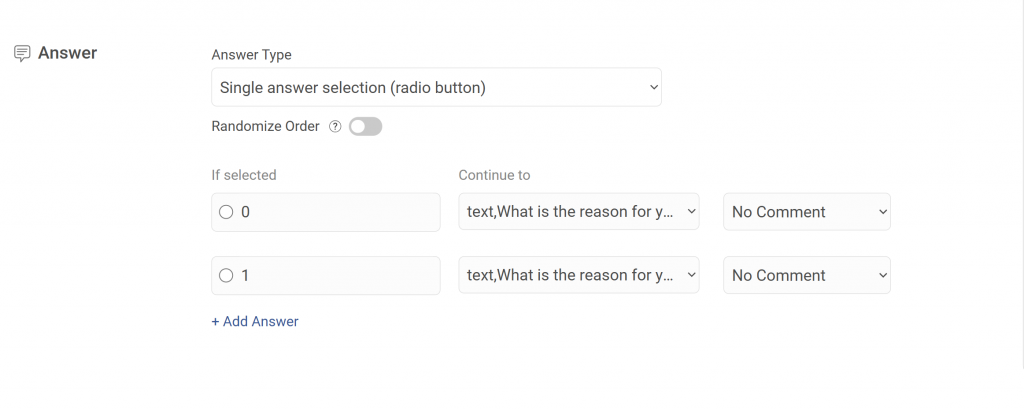
Qualaroo supports multiple-choice, rating-scale, and open-text fields within the same Nudge™.
Use branching to route participants to different follow-up questions based on their answers, so participants who found a task easy skip the follow-up that asks what made it hard, and participants who struggled get that depth automatically.
Here’s how you can use branching:
Keep each screen to 3 to 5 questions. Above that threshold, skip rates increase, and the responses you do get become less reliable.
Step 5: Set Your Targeting Rules
Move to the Targeting tab to control when, how often, and for how long the Nudge™ fires.
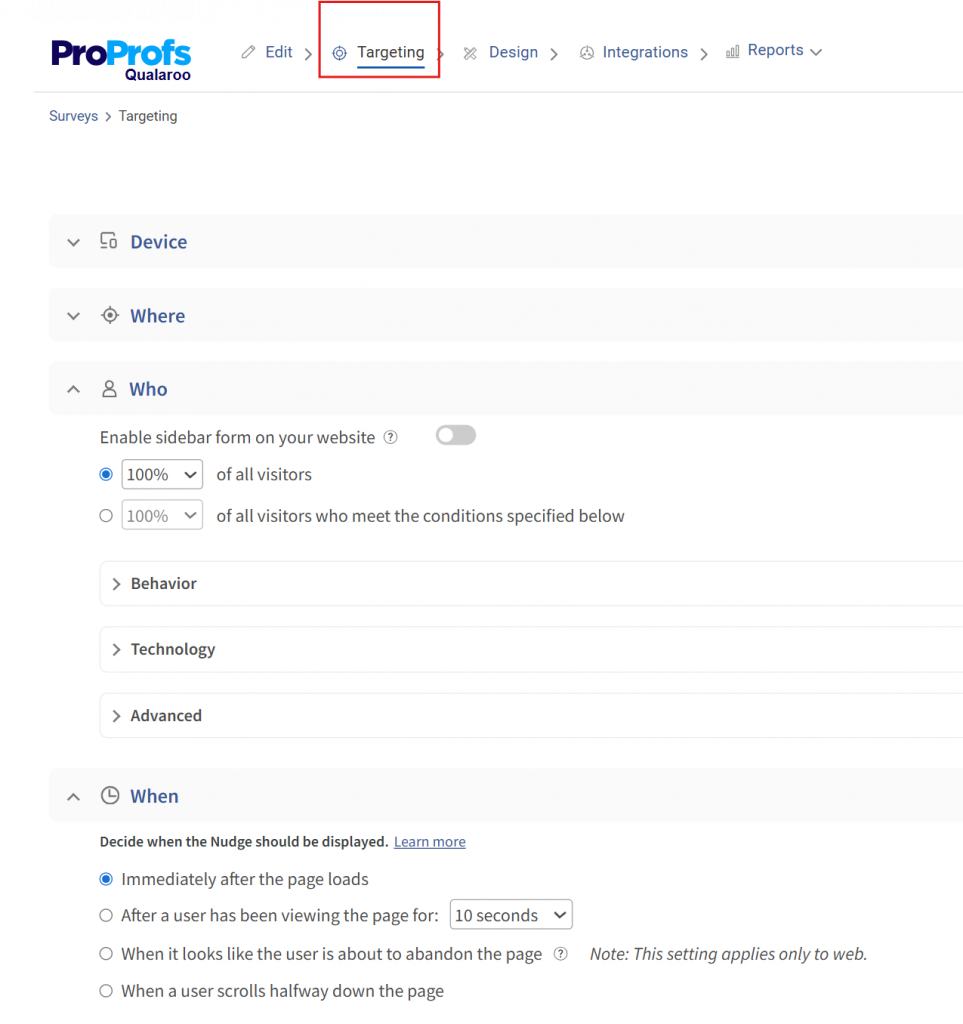
This tab also shows two URLs: your original prototype URL and the updated distribution URL that has Qualaroo embedded. The distribution URL is what you send to participants, not the original.
Use the targeting options here to control session timing, response frequency, and notification preferences.
If you are running multiple rounds with different participant segments, configure separate Nudges™ for the prototype with different targeting rules for each segment.
Step 6: Finalize and Distribute
Save your targeting settings. Make any final visual adjustments in the Design tab.
Then copy the updated URL from the Targeting tab and send it to your test participants.
Every participant who opens that link will see your prototype with the Nudge™ survey embedded and firing at the configured moments.
For open-text responses collected across sessions, Qualaroo’s AI Sentiment Analysis classifies each response by sentiment automatically, so you can identify which screens are generating negative reactions before your debrief without reading every reply individually.
Here’s how sentiment analysis works:
Questions to Ask During Prototype Testing
The questions you embed in the prototype, and when you embed them, determine the quality of the signal you get back.
Vague questions at the wrong moment produce polite, unusable answers. Specific prototype testing questions triggered at the right screen produce the feedback that drives real design changes.
Phase 1: First Impressions, Before Any Interaction
Ask these before the participant has clicked anything. You are testing whether the design communicates its own purpose, not whether users can figure it out with help.
These work as an opening survey Nudge™ triggered the moment the first prototype screen loads, before the participant begins any task:
- “Who do you think this product is for?”
- “What do you think you can do here?”
- “What’s the first thing you notice?”
- “Is there anything that feels out of place or doesn’t make sense?”
- “Does this remind you of anything you’ve used before?”
Here’s a quick first-impression prototype testing survey template:
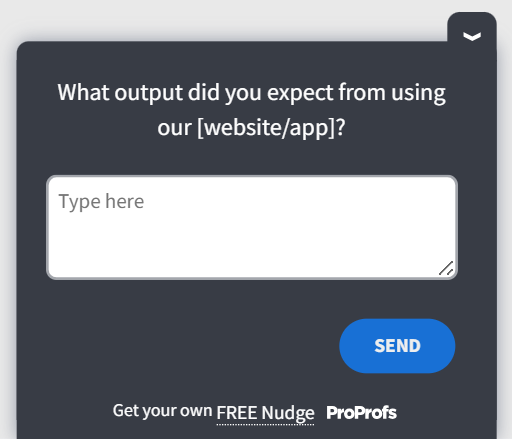
What you are looking for: whether users can identify the core value proposition, the intended audience, and the primary action within 10 seconds.
If they cannot, that is a positioning and visual hierarchy problem, not a copy problem.
Phase 2: During-Task Prompts
These surface the participant’s internal reasoning while the behavior is still observable. In moderated sessions, ask them verbally when the participant pauses, hesitates, or takes an unexpected path.
In unmoderated sessions, embed these as time-on-page Nudge™ triggers on screens where hesitation is most likely to occur.
- “Can you tell me what you’re thinking right now?”
- “What did you expect to happen when you clicked that?”
- “What are you looking for?”
- “Where would you expect to find that?”
- “Was there anything missing that you expected to see?”
Here’s a during-task prompt template for you:
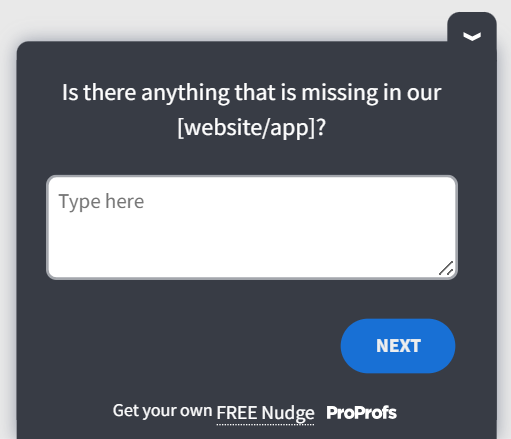
What you are looking for: the gap between what users expected and what the design delivered. That gap is your redesign brief.
Phase 3: Post-Task Structured Questions
Trigger these immediately after each task completes.
Configure the Nudge™ to appear as soon as the participant reaches the end state of a task flow, whether that is a confirmation screen, a dead end, or a point where the task was abandoned.
Keep the sequence to 4 to 5 questions per task. Beyond that, fatigue sets in, and response quality drops sharply.
After Each Task:
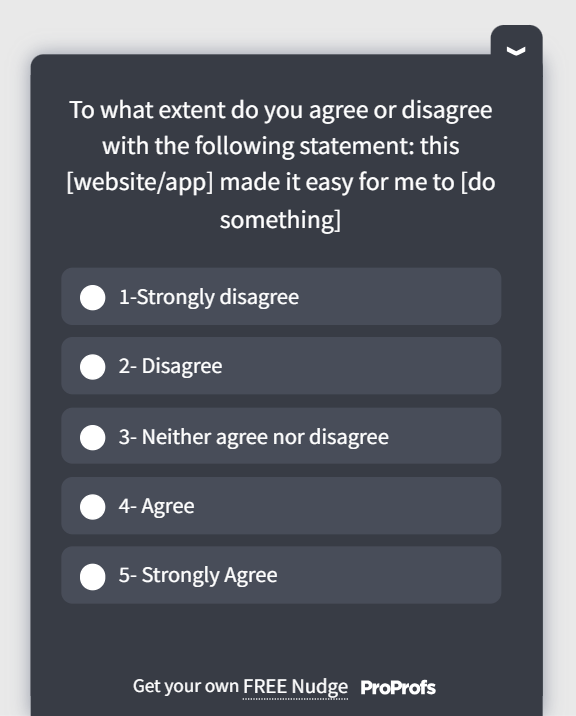
- “How would you rate the difficulty of that task on a scale of 1 to 5?”
- “What, if anything, confused you during that task?”
- “What would you change about that experience?”
- “Did the product guide you to what you needed?”
- “Is there anything you expected to see that wasn’t there?”
Here’s a prototype testing survey template for after-task prompts:
At the End of the Full Session:
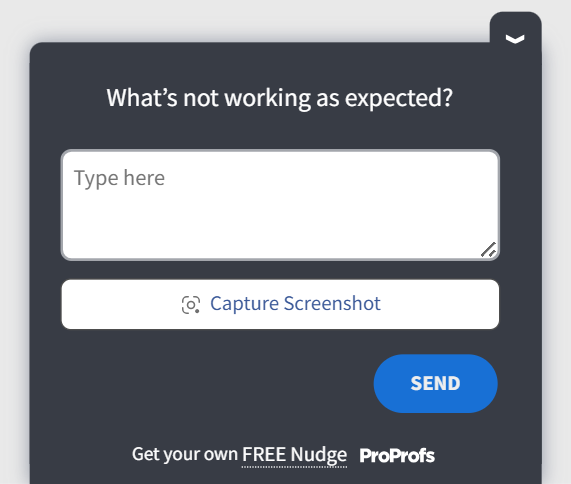
- “Was there a function you expected that was missing?”
- “How was the overall experience of moving through this?”
- “Would you use this? Why or why not?”
- “What would make you more confident using this?”
Here’s a prototype testing template you can use at the end of a full session:
Question Writing Rules That Change Response Quality
- Do not ask leading questions. “Did you find that easy?” is leading.
- “How would you describe that experience?” is not.
- Do not ask users what they would do hypothetically.
- Ask them to do it and observe what happens.
- Do not use the product’s own terminology in task or question wording if users would not already know it. The goal is behavior, not stated preference.
Matching Question Emphasis to What You Are Testing
| Testing Goal | Primary Question Phase | What to Prioritize |
| Concept Clarity | Phase 1 | First-impression questions triggered on screen load |
| Navigation And Ia | Phase 2 | Time-on-page triggers on key navigation screens |
| Microcopy Validation | Phase 3 | Post-task questions about specific labels and button text |
| Full Flow Usability | All three phases | Balanced question set across every task in the session |
| Comparative Testing | Phase 3 | Difficulty ratings and preference questions across both versions |
FREE. All Features. FOREVER!
Try our Forever FREE account with all premium features!
The Prototype Exists. Now, Make It Tell You Something Useful.
A prototype sitting in a shared folder is not a research asset.
It becomes one the moment you attach structured questions to it, send it to the right participants, and treat what comes back as design evidence rather than opinions to scroll through.
The teams that ship products users actually want are not running longer sessions or recruiting more participants.
They are asking better questions at the right screen, collecting responses while the experience is still live, and using what they find to make a specific change before the next round.
That loop, repeated two or three times, is what separates a prototype test from a prototype review.
You have the prototype. You have the framework. The next step is putting them together using Qualaroo.
Frequently Asked Questions
What is the prototype testing definition that applies to software product teams?
Prototype testing is the process of having real users interact with an early version of a product to identify usability failures, navigation gaps, and design mismatches before development begins. For software teams, it means testing an interactive prototype hosted on a live URL, embedding survey questions at key screens, collecting feedback during the session, and iterating on findings before the next round.
Why does prototype testing matter for product teams?
The State of UX in 2025 by Userlytics found 61% of companies validate products through prototypes. Problems caught at the prototype stage cost a fraction of what they cost in production.
What can and cannot you learn from testing a prototype?
Prototype testing reliably surfaces concept clarity, navigation gaps, task completion failures, and microcopy problems. It cannot tell you about final visual design appeal, content resonance, or conversion rates. Those require production-ready content and statistically significant sample sizes that a prototype session is not designed to produce. Know the scope before you write your research questions.
What is the difference between prototyping and testing a prototype?
Prototyping is creating the model. Testing is placing it in front of real users under structured conditions and observing what they do. Both are most valuable when treated as a loop: build, instrument, test, fix the critical issues, and test again to confirm the fix holds. Treating them as separate sequential phases loses most of what the methodology is designed to produce.
How many users do you need for prototype testing?
Five participants per round surface approximately 85% of usability problems, according to an extremely cited Nielsen Norman Group 2002 research. Run three rounds of 5 rather than one round of 15. Each round tests a revised prototype, so you are validating your fixes between rounds, not accumulating more data on a design that still has the same unresolved problems from the first session.
When should you start prototype testing in the product development process?
As soon as the prototype is navigable enough for a participant to attempt a realistic task. Low-fidelity wireframes are testable for concept clarity and information architecture without any visual polish. Waiting for the prototype to feel "ready" means waiting until users are too polite to give honest feedback. The earlier you test, the lower the cost of acting on what you find.
What is the difference between moderated and unmoderated prototype testing?
Moderated tests have a facilitator who can ask follow-up questions and probe reasoning in real time, making them better for complex or early-stage flows. Unmoderated tests have no facilitator, scale faster, and remove moderator influence on behavior, making them better for later-stage validation. Most teams benefit from starting moderated and switching to unmoderated once structural issues are resolved.
Why is in-context feedback more accurate than post-session surveys in prototype testing?
Memory reconstructs rather than reports. Participants answering questions 20 minutes after a session describe a simplified version of their experience, shaped by recall bias. Feedback captured at the exact screen where an experience happened reflects the actual reaction in the moment. That difference is significant enough to change your findings and the design decisions you make from them.
What separates prototype testing that improves products from testing that just documents problems?
Three things consistently separate the two. Task scenarios written around user goals rather than feature paths produce behavior that reflects real usage. In-context survey questions triggered at the right screen at the right moment produce accurate rather than reconstructed feedback. And retesting after each round of fixes verifies the change held rather than assuming it did.
What should you do with prototype testing findings?
Triage by severity first: problems that block task completion get fixed before anything that slows it, and both get fixed before cosmetic issues. After fixing, retest with the revised prototype to confirm the fix worked and did not break adjacent flows. Document the decision, not just the finding, so the reasoning survives when someone later proposes reverting the change.
FREE. All Features. FOREVER!
Try our Forever FREE account with all premium features!

 We'd love your feedback!
What did you like & how can we make it even better?
 Thanks for your feedback!
 Ask Your Question
Have a question? Get expert help to make your decision easier.