Adding a survey to your website takes less than 15 minutes. Pick a survey tool, build a 1 to 5 question survey, copy the embed code, paste it into your page or CMS, set a trigger, and you are live.
In this guide, you’ll learn how to:
- Place surveys on specific pages tied to a goal, not site-wide
- Set triggers based on behavior (scroll depth, exit intent, success event), never on page load
- Keep surveys to 1 to 5 questions; mobile audiences need 1 to 3
- Load third-party survey scripts with async or defer to protect Core Web Vitals
- Wait for at least 50 responses before drawing any conclusions
- You are the Data Controller under GDPR; your survey tool is the Processor
I’ll cover how to do each step correctly so you collect useful feedback, not noise.
Let’s begin!
How to Add a Survey to Your Website: Step by Step
Adding a survey to your website is the process of embedding interactive questionnaires or feedback forms directly into your web pages. This allows you to collect valuable user opinions, preferences, and insights in real-time while visitors are actively browsing. Surveys help improve user experience, understand customer needs, measure satisfaction, and gather data to make informed business decisions.
The fastest path from zero to live survey on your website, done correctly.
Most guides skip straight to “paste the code.” That works until you realize you are getting 11 responses, no one is finishing the survey, and the data is pointing in five directions at once. Here is how to do it right.
I am using Qualaroo throughout because it lets non-technical teams deploy targeted, behavior-triggered surveys without touching the codebase.
Step 1: Install the JavaScript Snippet
Most survey platforms work by adding a lightweight script to your site. You do this once, and it covers every survey you deploy going forward.
Inside Qualaroo:
- Go to the dashboard
- Click Install Code

- Select Paste Code in Website Source Code
- Copy the generated JavaScript
This is how the code will look:

Performance tip:
- Place scripts near </body> so they do not block page rendering
- Use async loading if your tool supports it
- Test site speed before and after installation using PageSpeed Insights
Third-party scripts can affect load time. A 300ms slowdown sounds minor until it starts moving your Core Web Vitals scores. Always verify after install.
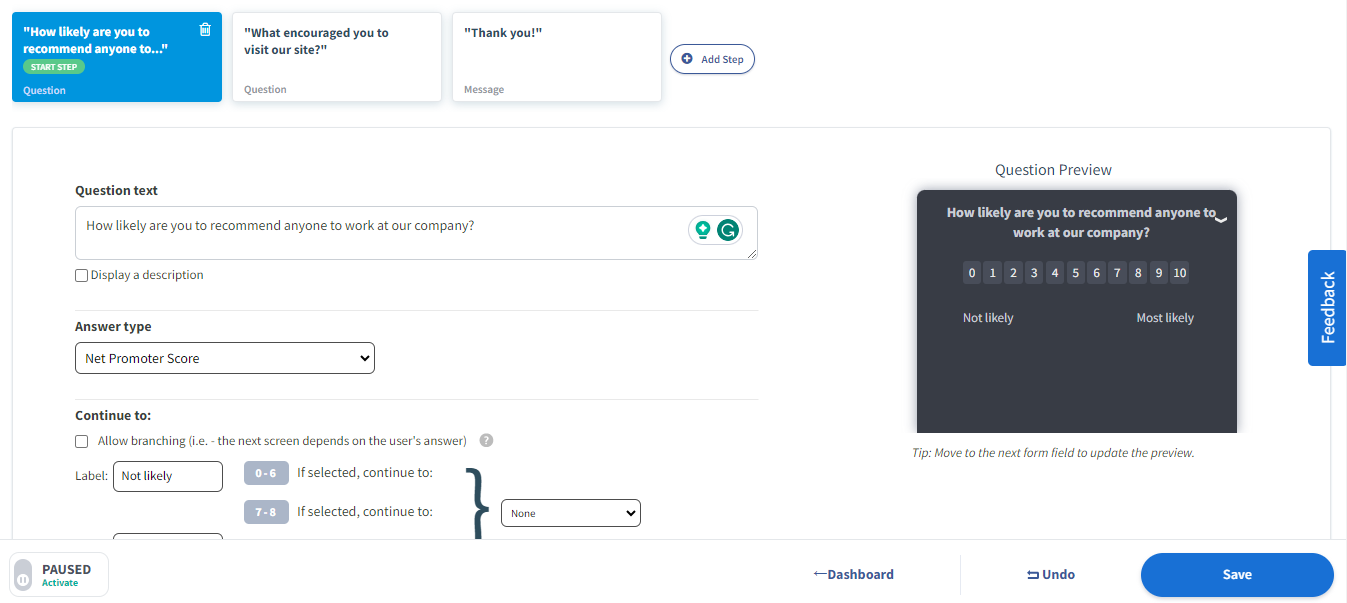
Step 2: Create Your Survey
Once the script is installed, build the actual survey inside the dashboard. The script is already on your site waiting to fire. Now you are telling it what to show.
Inside the dashboard:
- Click Create a Nudge

- Choose a your Nudge Type, which in our case would be Desktop and Mobile Web Nudge
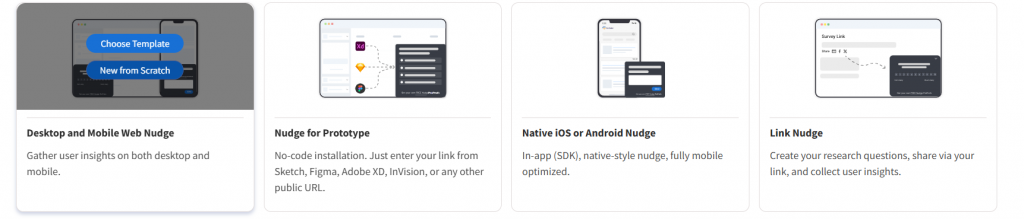
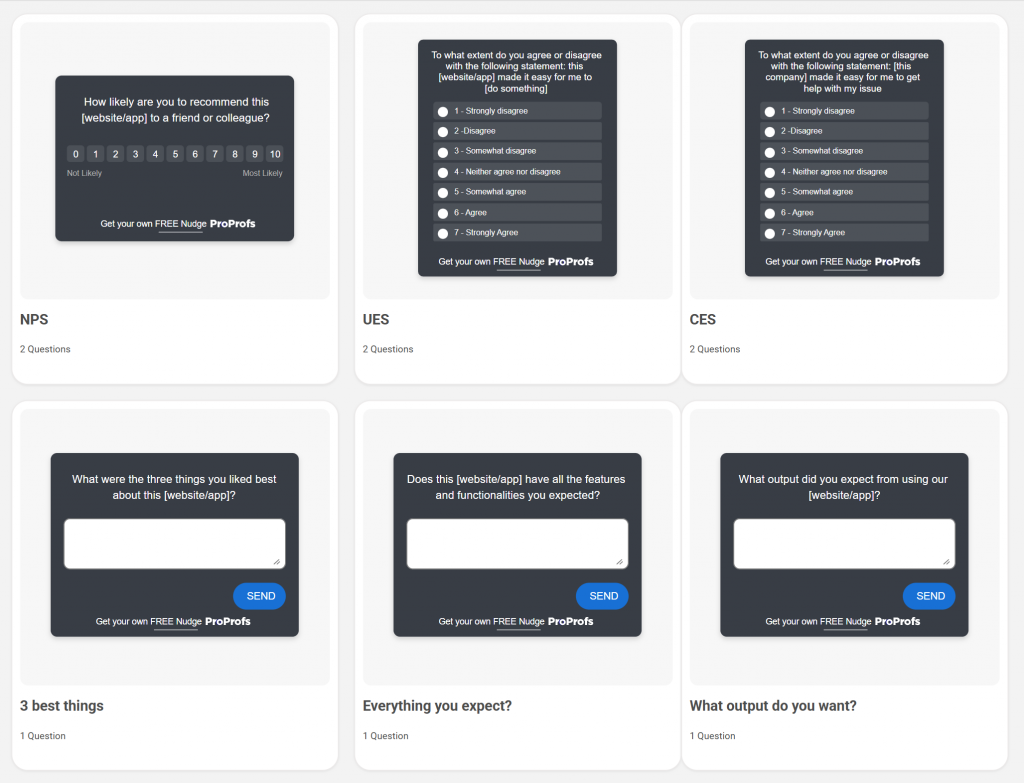
- Select a your survey templates such as NPS, CSAT, or exit intent
- Type or tweak your main question. For example:
“How easy or difficult was it for you to find the information you were looking for?”
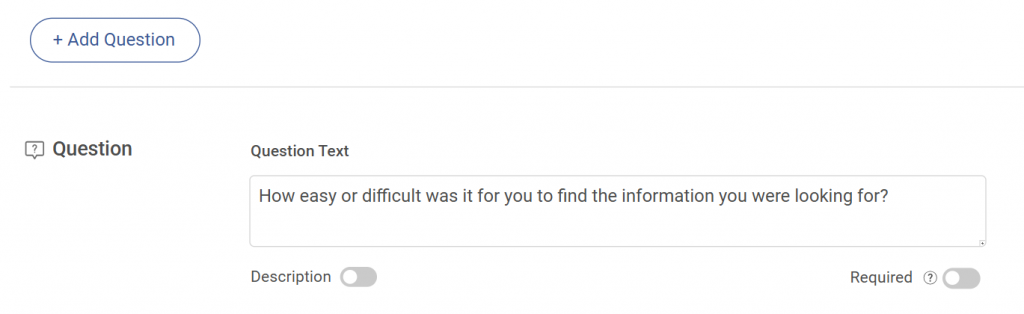
- Customize your answer options

Keep it short. For most websites:
- 1 to 3 questions is the right range
- One question per screen keeps completion rates high
- Add an optional open text field at the end if you want qualitative context
Mobile users respond better to tap-friendly scales and simple multiple choice options. If your audience skews mobile, emoji scales and two to three answer options outperform long dropdown lists every time.
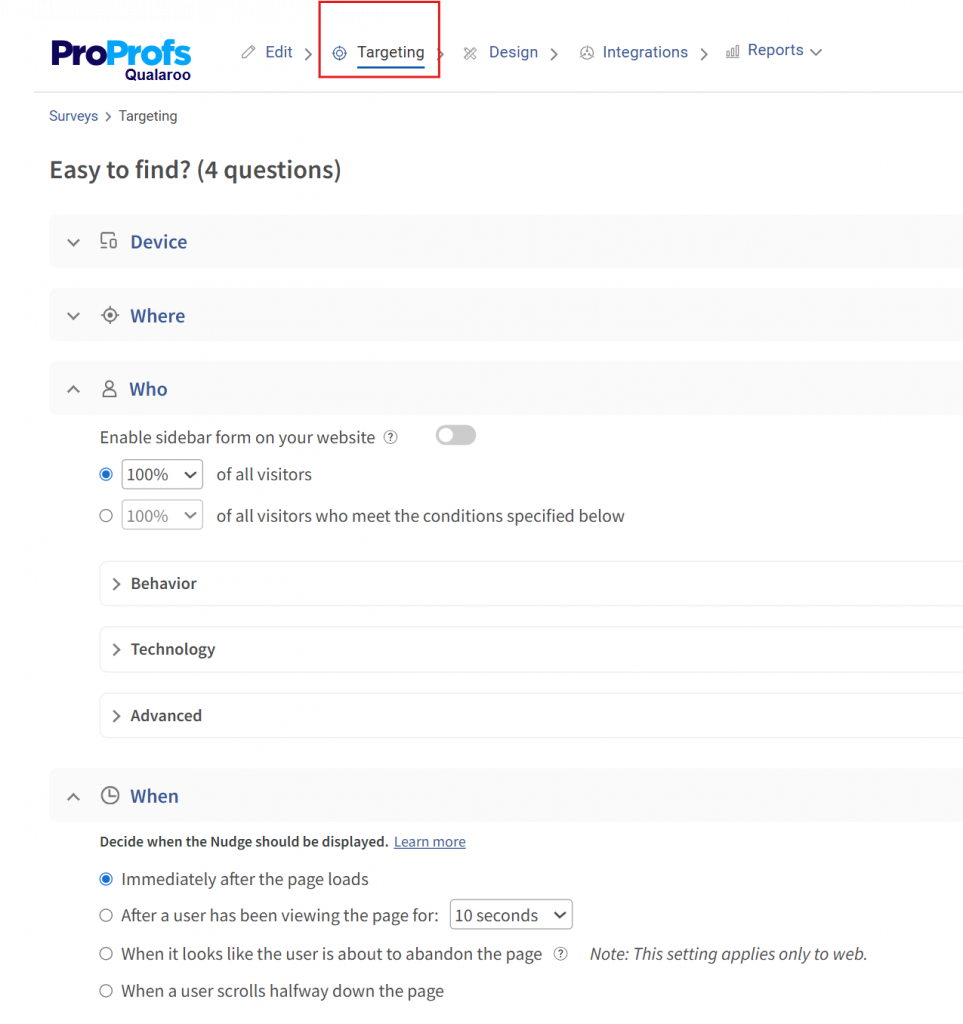
Step 3: Configure Targeting and Triggers
Advanced targeting determines the quality of your insight more than any other. A well-built survey shown to the wrong audience at the wrong moment produces noise. The same survey shown to the right person after the right interaction produces data you can act on.
You can define:
- Audience Segment: New versus returning users, logged-in versus anonymous, users who have visited more than two pages
- Page Targeting: Product pages, pricing pages, checkout, confirmation, or any specific URL
- Trigger Timing: 10-second delay, 30-second delay, after X page views
- Exit Intent Detection: Fires when the cursor moves toward the browser bar
- Scroll-Based Triggers: Fires after the user scrolls 50% or 60% down the page
Avoid This:
- Showing a survey immediately on the homepage before the visitor has done anything
- Interrupting the checkout or payment step where any friction increases abandonment
- Displaying the same survey on every page of the site
Targeting matters more than volume. 80 responses from the right audience on the right page will tell you more than 800 responses collected site-wide with no targeting logic.
Step 4: Activate and Publish
After configuration:
- Preview the survey in the live preview mode to confirm it looks and behaves correctly
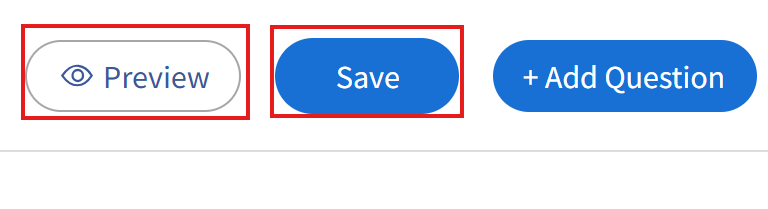
- Save and activate from the main panel where all your surveys are.

Your survey will now display based on your targeting rules. It will not show to users who do not match your conditions, and it will respect whatever frequency cap you have set.
Before you walk away, open the target page in an incognito window and verify the survey fires when it should. Then confirm it does not fire when the targeting conditions are not met. Five minutes of testing here prevents two weeks of bad data.
What Is the Right Type of Survey for Your Business Goal?
Not every website problem needs the same survey. Using the wrong type means collecting the wrong data even if everything else is set up perfectly. Here is how to match your goal to the right format.
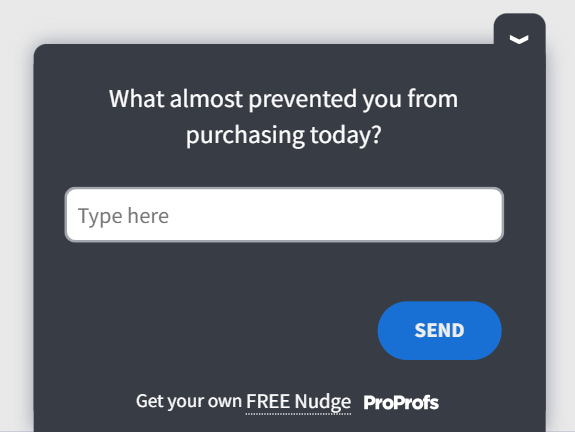
1. “I Want to Know Why Visitors Are Leaving Without Buying”
Use an exit-intent survey on the cart or checkout page. One multiple choice question (“What stopped you today?”) with 4 to 5 answer options and an optional open text field. Qualaroo lets you deploy this on a specific page with exit-intent triggering, no developer needed. Here’s an exit-intent template you can use:
2. “I Want to Know if Customers Are Happy After a Purchase”
Use a post-purchase CSAT or NPS survey on the order confirmation page. This is the highest-consent moment on your site. The transaction just worked, the user is still on the page, and response rates here are typically 3 to 5 times higher than cold survey links. Here’s a template you can use for post-purchase NPS:

3. “I Want to Understand What Is Confusing on a Specific Page”
Use an inline or widget survey on that page, triggered at 60% scroll depth. Ask one open-ended question: “Was there anything on this page that was unclear or missing?” You will get qualitative insight you did not know to look for.
Here are a few templates you should use in different scenarios:
| Goal | Survey Type | Placement | Trigger |
|---|---|---|---|
| Cart Abandonment | Exit Intent, MCQ | Cart or Checkout Page | Mouse Leave |
| Post-Purchase Satisfaction | NPS or CSAT | Order Confirmation Page | Page Load |
| Page-Level Confusion | Open Text Widget | Specific Content or Product Page | 60% Scroll |
| Feature Feedback | Short Conversational Flow | In-App or Feature Page | Click Trigger |
| Lead Qualification | Multi-Step Form | Landing Page | Time on Page |
What Does the Full Workflow Look Like?
Most people think of a website survey as a widget. It is actually a mini feedback loop. Here is what the full cycle looks like from a business perspective:
- Identify the Gap: Analytics tells you what users do. Surveys tell you why. The gap between those two is where decisions get made.
- Choose the Friction Point: Focus on a specific page, moment, or user segment, not “our website in general.”
- Design a Survey: Use the minimum number of questions to answer that one specific question.
- Deploy It: Place it on the right page with the right trigger and audience targeting.
- Collect Responses: Wait until you hit a statistically meaningful sample , 50 minimum, 100 preferred.
- Identify Patterns: Look for the answer that shows up in 30% or more of submissions, not individual responses.
- Make One Change: Act on the data. Measure what happens.
- Repeat: Move on to the next friction point and run the loop again.
This loop, run consistently, is what separates companies that improve conversion rates quarter over quarter from companies that run surveys once, get confused by the data, and abandon the whole effort.
Where Should You Place a Survey on Your Website?
The placement you choose determines not just who sees the survey, but what mental state they are in when they see it. That context shapes every response you receive.
| Placement Type | How It Works | Best Used For | Watch Out For |
|---|---|---|---|
| Inline Embed | Sits inside page content; reader encounters it while scrolling | Product pages, blog posts, landing pages | Burying it too far below the fold |
| Popup or Modal | Overlays the page on trigger | High-visibility NPS, exit feedback | Never fire on page load; always use a delay or scroll trigger |
| Slide-In Widget | Floats in from the corner after a trigger | Passive NPS across multiple pages | Too-frequent appearances on repeat visits |
| Exit-Intent Overlay | Fires when cursor moves toward the browser bar | Cart pages, pricing pages, high-bounce pages | Needs a frequency cap or it becomes noise |
| Dedicated Survey Page | Standalone page linked from email or CTA | Longer surveys (5+ questions) | Lower response rates than embedded formats |
Mobile Warning: Popups and modals are significantly more disruptive on small screens. Cap mobile surveys at 1 to 3 questions, use tap-friendly inputs like emoji scales or multiple choice, and always test the display on an actual device before going live. Mobile users abandon multi-step modals at roughly 3 times the rate of desktop users.
FREE. All Features. FOREVER!
Try our Forever FREE account with all premium features!
What Do the Embed Code Snippets Look Like?
Most tools generate these snippets automatically. Understanding the underlying patterns helps you customize behavior, troubleshoot issues, and communicate clearly with your development team. If you are using Qualaroo, triggers are configured in the dashboard , no code required.
1. Inline Iframe Embed
Use this when the survey lives inside your page content. The loading=”lazy” attribute defers loading until the user scrolls near it, protecting performance on longer pages.
This is how the html code will look:

2. Exit-Intent Trigger (Vanilla JavaScript)
The triggered flag ensures the overlay only fires once per session. Without it, the survey fires every time the user moves their cursor near the top of the screen.
This is how the javascript code will look:

3. Scroll-Depth Trigger (Fires at 60% Page Scroll)
Adjust the 60 to match the scroll depth that makes sense for your page length and where the relevant content lives.
This is how the javascript code will look:

How Do You Add a Survey in the Most Popular CMSs?
The first three steps are the same regardless of your platform. In your Qualaroo dashboard, navigate to your domain, click Install Code, select Paste Code in Website Source Code or GTM, and click Copy to Clipboard. Then follow the platform-specific steps below.
1. How Do You Add Qualaroo to Any Website Directly?
This is the baseline method that works on any site with direct HTML access.
1. In your Qualaroo dashboard, go to your domain and click Install Code

2. Select Paste Code in Website Source Code or GTM
3. Click Copy to Clipboard

4. Open your site’s HTML and paste the code directly after the opening <body> tag on every page you want covered

5. To verify: right-click the page, select View Page Source, and search for “kiq” , confirm the code block appears below the <body> tag and that the account and domain codes match
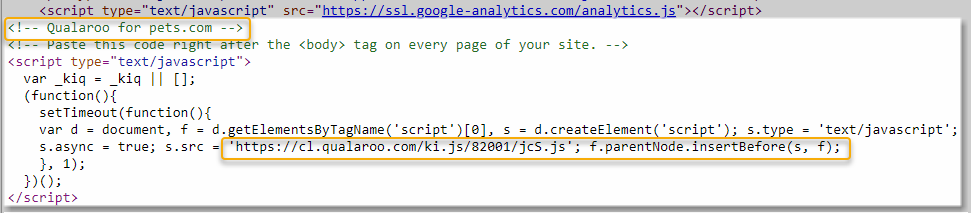
Performance Note: Qualaroo supports CDN delivery, which can improve loading time by up to 70% and helps bypass ad blockers. Check your Install Code page for the CDN option.
2. How Do You Install Qualaroo on WordPress?
- Log in to your Qualaroo account and copy the JavaScript from Install Code → Paste Code in Website Source Code or GTM
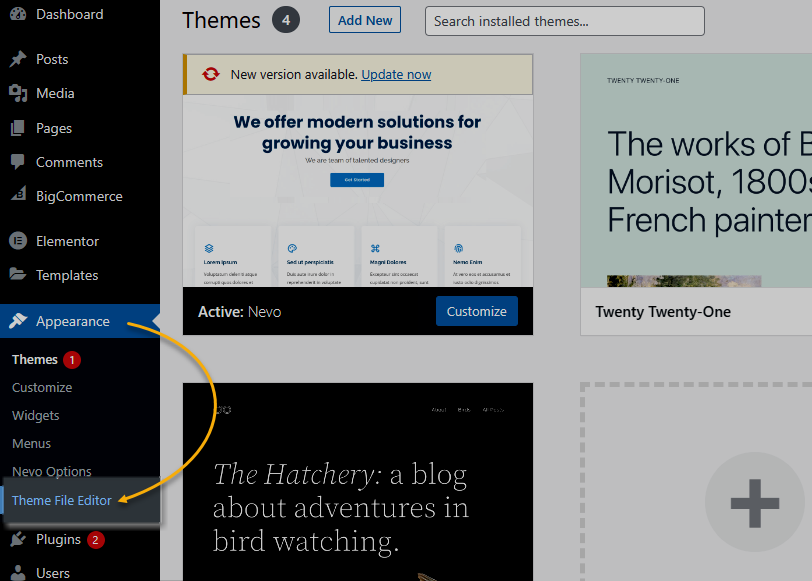
- Log in to your WordPress admin panel
- Go to Appearance → Theme File Editor
- Click Header from the Templates section on the right
- Find the <body> tag in the header file
- Paste the Qualaroo JavaScript directly below it
- Click Update File
3. How Do You Install Qualaroo on Shopify?
- Copy the Qualaroo JavaScript from Install Code → Paste Code in Website Source Code or GTM
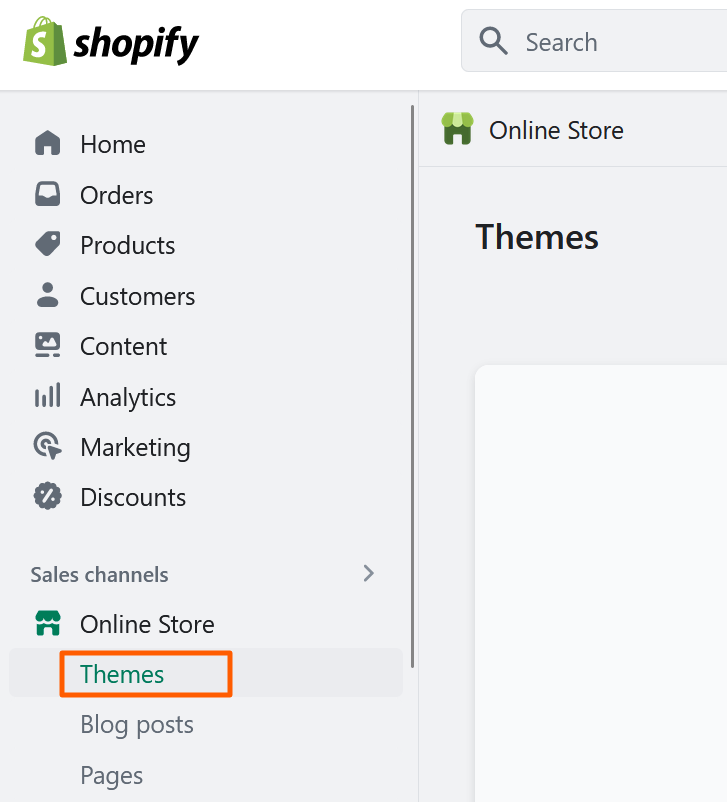
- In your Shopify admin, go to Online Store → Themes
- Click the ellipsis (three dots) next to your active theme and select Edit Code
- Open the theme.liquid file
- Paste the Qualaroo code either after the opening <body> tag or before the closing </body> tag
- Click Save
Note: Qualaroo will not load on the first two checkout pages due to Shopify’s security restrictions. It will load on the order confirmation page after checkout is complete.
4. How Do You Install Qualaroo Using Google Tag Manager?
Use this method if you do not have direct CMS access or want marketing to manage deployment without developer involvement.
Quick Setup Using the Qualaroo GTM Template:
1. Log in to Google Tag Manager and click Add a New Tag

2. Click Tag Configuration → Discover More Tag Types in the Community Template Gallery
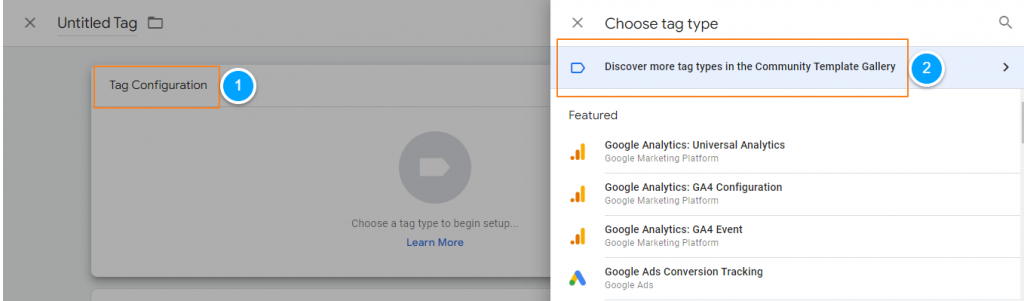
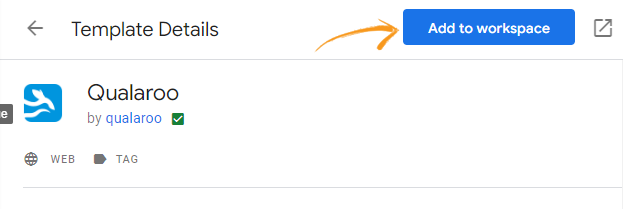
3. Search for Qualaroo and click Add to Workspace

4. Go to your Qualaroo dashboard, click Install Code, then click Quick Setup in Google Tag Manager
5. Copy the installation link and paste it into the GTM field

6. Select All Pages in the triggering option

7. Click Save → Submit → Publish
What Are the Performance & GDPR Risks You Need to Know About?
Performance and privacy are the two risks that catch teams off guard after launch, not because they are complicated, but because nobody thinks to check them before going live. Here is what to watch for.
1. Performance Impact
Third-party survey scripts can damage your Core Web Vitals if loaded incorrectly. The two metrics most at risk:
| Metric | What It Measures | Risk From Survey Scripts |
|---|---|---|
| Largest Contentful Paint (LCP) | How fast the main content loads | Synchronous scripts delay rendering |
| Total Blocking Time (TBT) | How long the main thread is blocked | Heavy scripts stall interactivity |
The fix is simple , always load third-party survey scripts with async or defer:
HTML: <script async src=”https://yourtool.com/widget.js”></script>
async loads the script in parallel with page rendering and executes it as soon as it is ready. defer also loads in parallel but waits until the HTML is fully parsed. For survey widgets that do not need to fire on page load, defer is the safer choice. Also add loading=”lazy” to any iframe embeds and compress images inside your survey forms.
2. GDPR & CCPA Compliance
Under GDPR, you are the Data Controller. Your survey tool is the Data Processor. You are responsible for what happens to the data your survey collects, even if the tool stores it on their servers. Before you deploy, confirm all of the following:
- Data Deletion Support: Your tool can delete individual user data on request , required under GDPR Article 17
- Signed DPA Available: Your tool has a Data Processing Agreement you can access and sign
- Privacy Policy Link: Linked from within the survey whenever you collect any personally identifiable information
- Consent Checkbox: Required if collecting name or email from EU users
- Data Storage Location: EU data stored on US servers has specific requirements under post-Schrems II frameworks
Watch Out For: Several free-tier survey tools have no DPA, no data deletion API, and no GDPR controls. If you are serving EU traffic, check compliance before you launch, not after. Qualaroo includes GDPR-compliant data controls, a signed DPA, and user data deletion on request.
What Is the Pre-Launch Checklist for a Website Survey?
Ten things to confirm before your survey goes live.
Run through every item before you hit publish. You will skip one of these the first time you are in a hurry, and you will regret it.
- Goal Defined: One specific question this survey will answer
- Question Count: 1 to 5 questions (1 to 3 for mobile-first audiences)
- Branching Logic Configured: Users only see questions relevant to their previous answers
- Placement Matched to Goal: Exit page, post-purchase, inline, or widget
- Trigger Set on Behavior: Not page load for first-time visitors
- Script Loading Confirmed: async or defer in place
- Frequency Cap Set: Maximum once per user per 7 days
- Mobile Display Tested: On a real device, not just a browser resize
- Privacy Policy Linked: Required for EU traffic collecting any PII
- Response Threshold Decided: Minimum 50 before you read a single response
FREE. All Features. FOREVER!
Try our Forever FREE account with all premium features!
What Do You Do When Your Survey Is Not Working?
Common problems, what causes them, and exactly how to fix them.
| Problem | Most Likely Cause | Fix |
|---|---|---|
| Survey Not Appearing on the Page | Ad blocker or Content Security Policy blocking the script | Test in incognito; check browser console for blocked requests; whitelist the survey domain in your CSP header |
| Page Loading Noticeably Slower After Adding the Survey | Script loading synchronously | Add async or defer to the script tag |
| Very Low Response Rate Under 2% | Survey triggering too early or targeting too broad an audience | Delay the trigger, narrow URL targeting, reduce question count |
| Survey Showing to the Same User Repeatedly | No frequency cap configured | Set a 7-day cookie-based cap in your tool's settings |
| Responses Seem Irrelevant to the Goal | Survey placed on the wrong page | Move it to the page that matches the experience you want feedback on |
| Embed Code Not Rendering in the CMS | CMS stripping iframe or script tags for security reasons | Use the tool's native CMS plugin or deploy via Google Tag Manager |
| High Start Rate but Low Completion Rate | Too many questions or a confusing question mid-survey | Cut to 3 questions maximum and review question clarity |
What Should You Do in the First 30 Days After Launching a Survey?
Week 1: Launch and Leave It Alone
Deploy one survey on your single most important page. Set the trigger. Do not touch it. Resist the urge to read the first few responses. Let data accumulate without interference. Your job this week is to confirm the survey is appearing correctly and the frequency cap is working.
Week 2: Check Your Sample Size
If you have under 30 responses, something is wrong with your targeting or trigger. Widen the audience, adjust the trigger timing, or check whether the survey is actually appearing using incognito testing. If you have over 50 responses, you can start reading for patterns. Do not make decisions yet. Look for the answers that are showing up repeatedly.
Week 3: Map Findings to Actions
For each finding, name one specific action , change a page element, add a payment method, fix a broken link, update confusing copy. Assign each action to a person with a deadline. If your findings point in too many directions, your survey was too broad. Narrow it and run it again.
Week 4: Implement One Change and Measure It
Make one change informed by the data. Set up a simple before-and-after measurement: conversion rate, bounce rate, or average session duration on the affected page. You are not looking for statistical significance from a single change. You are building the discipline of closing the loop between feedback and action.
After Day 30:
Decide whether to run the same survey again for benchmarking or replace it with a new question targeting the next friction point. The goal is a continuous loop, not a one-time data pull. Teams that run this loop every 30 days improve faster than teams running quarterly research projects.
What Should You Look for in a Tool to Add a Survey to Your Website?
The best survey tool is the one your team will actually deploy, iterate on, and act from. A perfectly featured tool that nobody uses produces zero data. Before you commit, run your shortlist against these five criteria:
| What to Evaluate | Why It Matters |
|---|---|
| Targeting and Trigger Options | Without page-level targeting and behavioral triggers, your data will always be noisy |
| Completion Rate Format | Conversational, one-question-at-a-time interfaces outperform multi-question forms by up to 40% |
| Performance Footprint | Does the tool load asynchronously by default? Does it document its Core Web Vitals impact? |
| GDPR Controls | Signed DPA, data deletion on request, privacy policy linking, non-negotiable for EU traffic |
| Integrations | Can it push response data to your CRM, support tool, or analytics stack without a manual export? |
triggers, and GDPR compliance built in.
It is designed for marketing and product teams who need to deploy without engineering support and act on data without a data analyst. If your primary use case is on-site feedback and user research, it is worth evaluating as your starting point.
Your Website Is Already Talking. Are You Listening?
Every page on your site is a conversation happening without you. Visitors land, hesitate, click, abandon, and leave; and your analytics capture the what but never the why. That gap is not a data problem. It is a question you have not asked yet.
A survey fixes that. Done well, one survey on one page can surface an insight that changes a checkout flow, clarifies a pricing page, or removes a friction point that has been quietly costing you conversions for months.
The setup takes 15 minutes. The first useful insight usually arrives within two weeks. Adding a survey to your website can be pretty easy, just use the right survey tool!
The teams that compound on this, running one focused survey every 30 days and acting on what they learn, are the ones that stop guessing and start knowing.
Frequently Asked Questions
What is the best place to put a survey on a website?
The best placement depends on your goal. Exit-intent surveys on cart or checkout pages work best for understanding abandonment. Post-purchase surveys on confirmation pages capture satisfaction at peak engagement. Inline surveys on product or content pages collect specific page-level feedback. Avoid placing surveys on your homepage or deploying them site-wide.
How many questions should a website survey have?
1 to 5 questions for desktop audiences, 1 to 3 for mobile. Every question you add beyond three reduces completion rate by roughly 5 to 10%. If you have more than five things to ask, run two focused surveys at different points in the user journey.
Does adding a survey slow down my website?
It can, if the script is loaded synchronously. Always add async or defer to third-party survey scripts. For iframe embeds, add loading="lazy". These two attributes prevent the survey from blocking page rendering and protect your Core Web Vitals scores.
How many responses do I need before acting on survey data?
At least 50 for directional insight. 100 or more before making significant product or design decisions. Reading 5 to 10 responses and drawing conclusions is a reliable way to make confident bad decisions.
What is the difference between an NPS and a CSAT survey?
NPS (Net Promoter Score) asks how likely a user is to recommend your product or company, on a scale of 0 to 10. It measures overall loyalty and is best run at regular intervals. CSAT (Customer Satisfaction Score) measures satisfaction with a specific interaction, typically on a 1 to 5 or 1 to 10 scale. Use NPS for relationship-level tracking and CSAT for transaction-level feedback.
What are my legal responsibilities when running a website survey?
Under GDPR, you are the Data Controller and your survey tool is the Data Processor. You are responsible for ensuring user data can be deleted on request, that a privacy policy is linked from the survey if you are collecting PII, and that your tool has a signed DPA. For US audiences, CCPA has similar requirements around data access and deletion rights.
What is exit-intent targeting and when should I use it?
Exit-intent targeting fires a survey when a user's cursor moves toward the top of the browser, indicating they are about to close the tab or navigate away. It is most effective on pages with high drop-off rates like cart pages, pricing pages, or long landing pages. Because it catches users at the moment of decision, the feedback tends to be more honest and specific than surveys triggered mid-session.
FREE. All Features. FOREVER!
Try our Forever FREE account with all premium features!
 We'd love your feedback!
What did you like & how can we make it even better?
 Thanks for your feedback!
 Ask Your Question
Have a question? Get expert help to make your decision easier.